Introduction
Windows 11 is Microsoft’s latest operating system, by giving users a new and modern experience with its sleek design, new features, and better performance. Windows 11 has a lot to offer, from the redesigned Taskbar and centered Start Menu to improved multitasking features like Snap Layouts and virtual desktops. A fresh installation of Windows 11 is the best way to ensure optimal performance.
For many users. It gives your computer a new start by getting rid of old files and software conflicts. Windows 11 can be installed from a USB drive in a reliable and effective manner
Whether you’re upgrading from Windows 10 or setting up a new computer. From creating the bootable media to finishing the installation, we’ll walk you through each step of installing Windows 11 from a USB drive in this guide. Let’s get going!
Table of Contents
Prerequisites
1. A Compatible PC
Your PC must meet the following minimum requirements:
- Processor: 1 GHz or faster with at least 2 cores on a compatible 64-bit processor or SoC
- RAM: 4 GB or more
- Storage: 64 GB or more
- System Firmware: UEFI, Secure Boot capable
- TPM: Trusted Platform Module (TPM) version 2.0
- Graphics Card: Compatible with DirectX 12 or later with WDDM 2.0 driver
- Display: >9” with HD Resolution (720p)
- Internet Connection: Required for updates and certain features
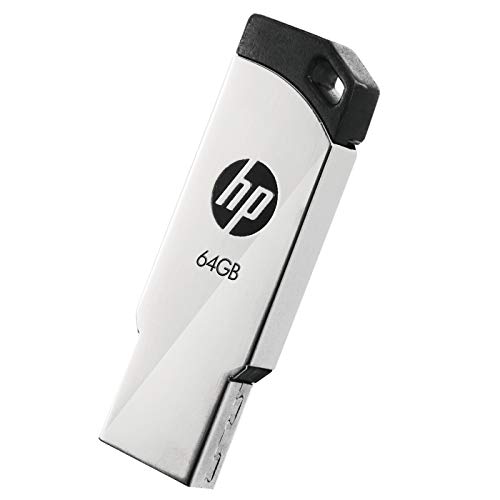
2. A USB Flash Drive (8GB or Larger)
Ensure it’s empty or back up any important files, as it will be formatted. If you don’t have a pendrive, click the link to buy one.


3. Backup Your Data
Back up all your important data before starting the installation to avoid any loss.
Step 1: Create a Bootable USB Drive
The Windows Media Creation Tool is an official Microsoft utility used to create bootable Windows installation media.
How to Download It:
- Visit Microsoft’s official download page.
- Click on Download Now under “Create Windows 11 Installation Media.”
- Run the tool as administrator after download completes.

Screenshot: Media Creation Tool interface with license terms and USB option.
Step 2: Download Windows 11 ISO
After launching the tool:
- Less chaos, more calm. The refreshed design of Windows 11 enables you to do what you want effortlessly
- Biometric logins. Encrypted authentication. And, of course, advanced antivirus defenses. Everything you need, plus more,…
- Make the most of your screen space with snap layouts, desktops, and seamless redocking
- Accept the license agreement.
- Select language and edition or leave default.
- Choose USB flash drive when prompted.
- Select your USB drive from the list.
- Click Next to start the download and USB setup.
Screenshot: Progress bar showing Windows 11 being downloaded and written to USB.
Step 3: Prepare the USB Drive
The Media Creation Tool formats the drive automatically, but if using an ISO manually, try Rufus:
- Download Rufus from rufus.ie.
- Open the tool and insert your USB drive.
- Select the Windows 11 ISO file.
- Leave settings as default (GPT, NTFS) and click Start.
Screenshot: Rufus interface with ISO selection and formatting options.
Step 4: Boot from the USB Drive
- Restart your PC.
- Press the BIOS/UEFI key (usually F2, DEL, ESC, or F12).
- Navigate to Boot Settings or Boot Priority.
- Set USB as the first boot device.
- Save and exit BIOS.
Step 5: Install Windows 11
- Select language, time, and keyboard layout.
- Click Next, then Install Now.
- Enter product key or skip to activate later.
- Choose the appropriate Windows 11 edition.
- Accept license terms.
- Select Custom: Install Windows only (advanced).
- Select the drive and delete existing partitions for a clean install.
- Click Next to begin installation.
Step 6: Complete the Setup
- Choose your region and keyboard layout.
- Connect to Wi-Fi.
- Sign in with or create a Microsoft account.
- Set up a PIN and privacy settings.
- Customize theme, language, and preferences.
Troubleshooting Common Issues
USB Not Booting?
- Try different USB ports (USB 2.0 preferred for older machines).
- Ensure the USB is bootable.
- Check BIOS settings (Secure Boot, Legacy mode).
TPM or Secure Boot Error?
- Enable TPM and Secure Boot in BIOS.
- Update BIOS firmware if needed.
Installation Freezes or Fails?
- Recreate the bootable USB.
- Check your system’s RAM and hard drive health.
- Disconnect unnecessary peripherals during installation.
Conclusion
Performing a clean installation of Windows 11 ensures a fresh, fast, and secure system. The process might seem technical, but with the right guidance and preparation, it becomes quite straightforward.
Now that your Windows 11 setup is complete, take some time to explore its features. If you have any questions or ran into any issues during the process, feel free to leave a comment — we’d be happy to help!
Additional Resources
- Download Windows 11 – Official Page
- Microsoft Support Forums
- PC Health Check Tool
- Windows Insider Program